
COLOUR PATTERN AND TEXTURE - Introduction to Digital Media
Introduction
This project can be used and applied to many different design productions. This breakdown is how I, from a beginner standpoint, built my own pattern and made it look professional. With some moments of discovery and a little bit of exploration you can too. Over all I suggest that when tackling the creation of a pattern that you try as many variations as possible. Really amazing things come from accidents, so don't be afraid to make some!
Materials
Adobe Illustrator
Creative process
We were challenged in our design course to make a Hawaiian shirt right from scratch. We had to make our own shirt, tag, button and the hardest part an original pattern.. When pressed with this issue at first I found it very hard to be creative, how was I supposed to come up with an original design?! Impossible, I know. Somehow with my mighty little brain, I decided to do an underwater theme, keeping it traditional to the Hawaiian shirt aesthetic we all know and love. I’ve decided to take you on the journey of building a pattern from the ground up and all the steps I took along the way to create my final design!
Productions Workflow/Materials

I used the pencil tool to do a simple design as my foundation. My goal was to build up the background but I wanted my immediate design to hold its own in a way that it wouldn't be drowned out. I liked the hand drawn look of it all, the thick lines and simplistic design would translate well to a pattern because it wasn't too much and could be repeated without being too overwhelming to the viewer. I was making a shirt that should hypothetically be wearable so I had to keep a lot of things in mind.

I filled in my fish in with a colour theme I found appropriate for 'underwater', leaving some spaces where the background could show through. I wanted to create a layered piece to show dimension but still have each layer relate to the last.

I created a circle with the shape builder and filled it in with a colour that would compliment my pre-chosen colour scheme. Also with anticipation that it would be my middle piece so it needed to be something that would blend well. The circles keep the soft and comfortable feeling I am aiming for as well.

I found a water reflection image off of google images and thought this would fit well with my underwater theme. I didn't know how I was going to work it in yet but I had some high hopes for myself. Maybe a little too high.

I wanted to make a circle out of the reflection and we had discussed ways in class, but I was left to my own devices so it took me some time to actually execute it..

I figured out that I could make a mask over my copied circle. This happened through lots of trial and error and I mean lots, so here I am making it look easy for you. Basically all you need to do is take your image and shape, make sure the shape is in the front, and highlight both. Then you make your way up to 'object' on your toolbar and go all the way down, and you'll see the option 'clipping mask'. After clicking 'make' you'll have the product you need, the image will have fit itself around your shape. Sounds impossible I know, but don't worry, I'm here to help!

I layout my two circles, my new masked one in the back and oriented them in a way I found most pleasing.

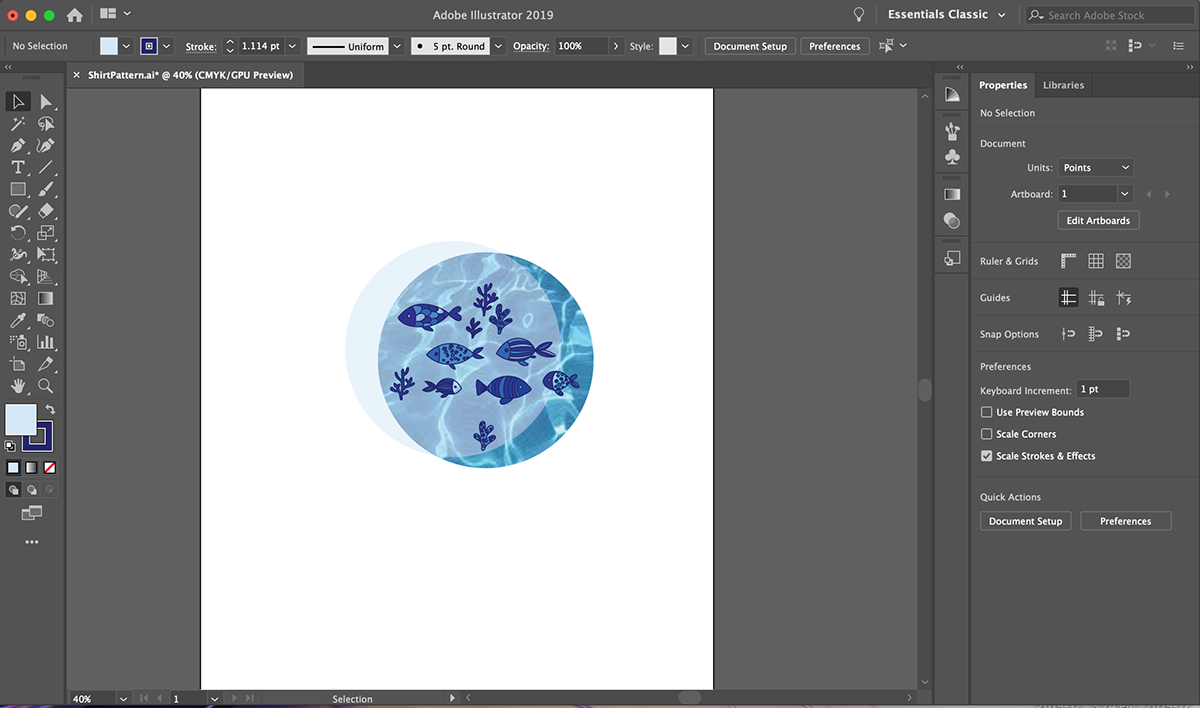
I wanted my water reflection to really gain some appreciation, so I decided to bring the opacity of my original circle down to 50%. This way you get that see-through aspect of some beautiful clear Caribbean water. All my fish lovers out there would love it and overall I thought it looked pretty cool too.

Finally this is it, my hard work all assembled and looking pretty!
Going That Step Further..
This entire product is meant to be applied to a patter right, so why wouldn't I go over that too!

What you wanna do is select your entire piece and make your way back over to that object option in the toolbar. Find 'pattern', click 'make', then just go ahead and make yourself one.

After applying that your creation will become the pattern of your dreams. You are given a plethora of settings you can run the pattern through until you find the perfect orientation that fits your fancy.
Final Product

Conclusion
So there you have it the total assembly of my pattern tile and how I applied it to the project of my choice. I had a very good time filtering through all my options of possible manipulations and I encourage everyone to do the same. I cut out my struggles in an effort to let you bypass a struggle of your own, but again some of the best things come out of mistakes! This was a new experience for me and I am proud of what's come out of it, I definitely threw myself into the deep end for this one, though I encourage you to do the same.


